I spent a while choosing and finding the right rolling chassis to use, and in the spring of 2014 found a lowered Chevy S-10 frame with the body and powertrain already removed. I started working on this project in August 2015, removing the engine (a previously transplanted Olds 455 Rocket) from my "organ donor" truck, a '75 Ford Supercab.
The frame was already lowered 2" front and back, but I still needed to remove the stock fuel tank, and fabricate engine mounts and transmission crossmember to fit the big-block Olds into the S-10 frame.
This engine ran well, so all it needed was some cleaning up. I replaced the oil pump and timing chain as a preventative maintenance measure, and changed valve cover gaskets along with oil pan and timing cover gaskets. The 3-speed standard transmission and bell-housing came from a '68 Pontiac Tempest.
Other frame modifications included shortening the frame horns at the front to allow the IH fenders and nose to fit, and manufacturing cab mounts. This process took a while, with all the measuring, calculating, re-measuring, and test fitting.

Removing the front-end sheet metal from the IH frame was fairly easy. Once I had the S-10 frame ready to go, I used my son Joseph's telehandler to remove the cab from the old frame and set it on the new one.

The front-end sheet metal needed some careful modifications to fit low enough and far enough back on the frame to meet up with the cab. The frame horns had to be cut back flush with the steering box, then the bottom of the rad support needed to be cut away, as well as the bottom of the inner fenders.
Everything fit together in the end, but there is definitely no room for a radiator. So, the rad needs go behind the cab (with the battery holder and fuel tank), with an electric fan and a means of directing air to flow through the rad.
I can see why small-block Chevy engines are so popular for older trucks. The big-block Olds makes for a tight fit all the way around. I had to modify the alternator bracket to fit the alternator under the top of the left fender. Since I was fabricating anyway, I built a Rocket symbol into the bracket.
Once the front end was fitted to the cab, it came off and on many more times, as I needed to install a master cylinder, brake booster and pedal assembly, a steering column, clutch linkage, and throttle linkage. These parts (with the exception of the scratch-built clutch linkage) were graciously donated by a 76 Delta 88, a 76 Chevette (which was also the bucket seat donor), a 79 Monte Carlo, and a 75 Ford F-100. All of these organ donors were in my back yard. In true rat rod tradition, I am scrounging and fabricating as many parts as possible for this "Frankenstein."
I originally built this clutch linkage to fit the Olds 455 and Pontiac bell-housing in my 75 Ford Supercab, to mate this engine to the Ford 4-speed. With a few further modifications, I was able to make it work for this truck.


The throttle linkage was a simple mod, except I had to make a steel gas pedal after I melted the plastic one when I welded too close to it.
Once all the pedals were in place to stay, I carefully built the cab floor (out of 16-guage metal) to give maximum leg and foot room in this tiny cab.
I made the shifter knob from an antique wrench, and a piece of an old camshaft.
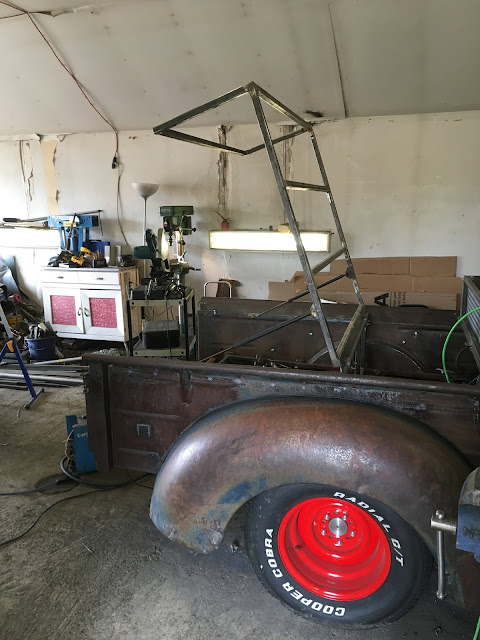
In June 2017, I was fortunate to be able to locate an original box and rear fenders for this truck in Consul, SK (about 5 hours from home). The box came off a KB-2, so it is a little longer than the original KB-1 box. This is a good fit for the S-10 frame, which has an 8" longer wheelbase than the KB-1.
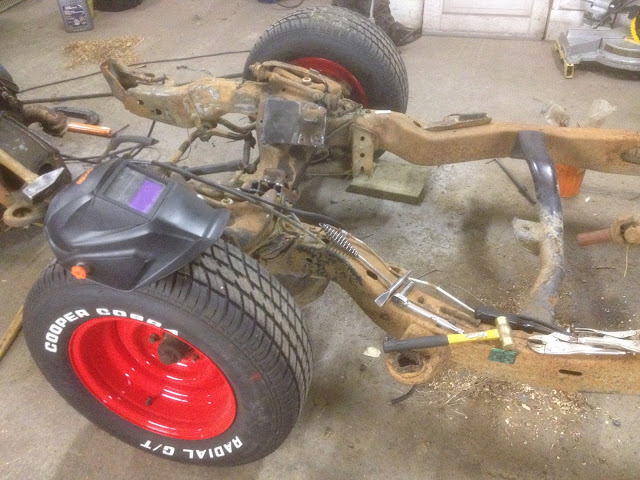
Before modifying and installing the box, a rear axle upgrade was in order. I changed out the small 10-bolt GM differential and axle, and replaced it with a 9" Ford axle. A complete aftermarket narrowed axle assembly was available, but too expensive for my budget, so I used the axle out of my 75 Supercab, and narrowed it myself to Chevy S-10 width so the rear tires would fit inside the stock IH fenders. I ordered shortened aftermarket axle shafts, complete with hubs and bearings (and the option of 3 pre-drilled bolt patterns to use), then cut and re-welded the axle housing myself.
Once the diff and axle shafts were removed, the housing needed to be carefully measured, marked, and cut. Then, after a careful aligning, re-welded.
I bought axle shafts on line from Speedway Motors. They came with bearings and seals, and the ends were splined for the first 10 inches or so, and simply needed to be cut to the length I needed. Trying to cut and re-weld factory heat-treated axle shafts is almost always a recipe for breakage at some point. These replacement axle shafts were a great affordable alternative. The hubs are pre-drilled with 3 different 5-bolt wheel patterns. I installed new wheel studs to fit my wheel rims, which are the standard GM pattern for an S-10 and many other vehicles. This photo shows the difference from the original axle length to the shortened size.
Once the housing was complete, I transferred the S-10 leaf spring mounts to the Ford housing, and welded them in place.
The lowering blocks (which drop the truck frame a little closer to the ground) needed to be modified slightly to get the desired tilt on the differential, to position the driveshaft in a straight line between the diff and the transmission, to minimize wear on the u-joints.
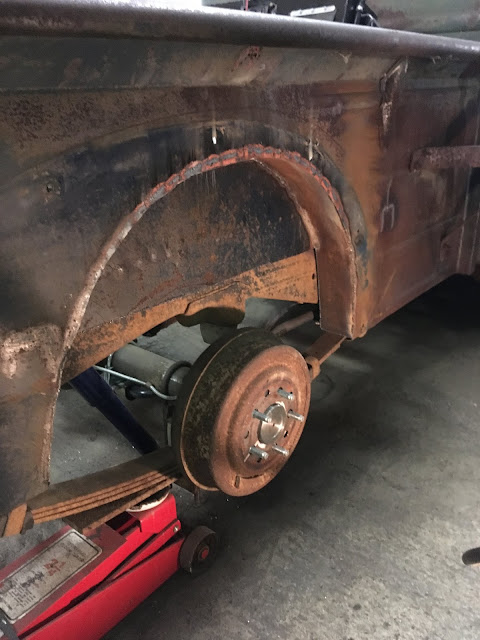
The old rear brakes needed to come off, so a new wheel cylinder and brake shoes could be installed on each side. The old seized-up parking brake cables were also replaced with new cables.
The right-hand side of the old axle had a leaking seal for a while, so this side was an oily mess.
The Ford brake drums needed modifying to fit the GM bolt pattern and hub size, so I needed to drill a new bolt pattern, and carefully ream the center hole a little bigger.
The next step was to change out the U-joints and install the custom driveshaft (which I had built for a previous project several years ago out of seamless tubing, with a Ford yoke on the back, and a GM slip-yoke on the front). This only needed shortening by a few inches to fit this truck. I had this done by Triland Welding and Machine in Lloydminster.
Before filling the diff with oil, changing out the u-joints, and installing the driveshaft, I also replaced the pinion seal.
I'm comfortable that this rear end will stand up to the torque from the big-block Olds. Ford 9" rear ends are one of the most popular axles for performance vehicles and race cars, due to their strength and durability, as well as the ability to quickly and easily change gear ratios, install posi-trac, etc. The diff I chose was a 3.00 ratio, 31-spline, non-posi unit. I felt this would be a practical balance of power and fuel economy behind my 3-speed standard non-overdrive transmission.
The next job (May 2018) was to install a new twin-chamber master cylinder and proportioning valve (originally built to fit an Olds Delta 88), run new steel brake lines throughout, and replace front calipers, rotors, and brake pads.
After much difficulty getting enough pressure to the rear brakes, I had to discard the Delta 88 master cylinder (which was designed for front disk / rear drum brakes), and replace it with one for a '69 Cutlass with front and rear drum brakes. Due to the smaller S-10 front calipers and larger Ford rear wheel cylinders, this master cylinder, although not designed for a disk/drum system, works well with good stopping power at all 4 wheels.
Next came time for the exhaust system. Rather than spend several hundred dollars at a muffler shop, I once again raided my backyard parts collection for materials. With a little bending and welding, I was able to re-use most of the exhaust system from my '75 Ford Supercab (some of which was already re-used from a '76 Delta 88), all of which was in very good condition.
The factory exhaust manifolds on the Olds engine are designed for single exhaust coming off the rear of the right-side manifold, with a crossover pipe under the engine, connecting the two manifolds. Because I was building a dual exhaust system, I needed to weld up a cap to block off the center outlet on the right manifold, so the exhaust would exit only from the rear of the manifold.
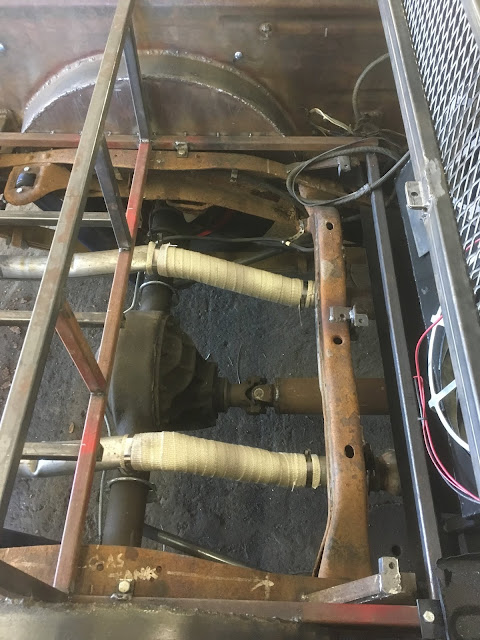
Both sides of the big-block Olds are a tight fit inside the S-10 frame, so some sharp pipe bends were needed behind both manifolds. From there on back, there was room to run the pipes up above the two mid-frame cross-members under the cab, so there are no exhaust pipes hanging below the frame rails (which is good for a truck that will have fairly low ground clearance).
For a parking brake, I robbed the brake lever assembly from my '86 Chevette parts car, and built a bracket to mount it the floor of the cab.
Once the parking brake lever was solidly installed, I was able to splice some leftover lengths of cable, and attach them to the new rear cables. We now have brakes and a parking brake!!
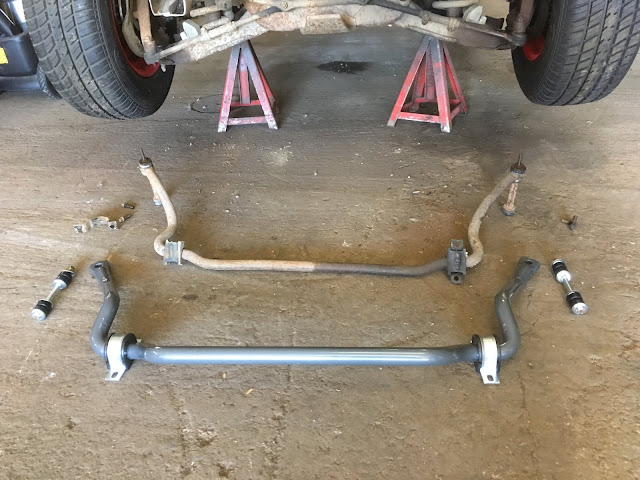
The S-10 chassis had a front sway bar (its purpose being to prevent body roll when cornering), but none in the rear. I ordered a rear sway bar and heavy-duty front sway bar, and installed both.
The original front sway bar was 7/8" in diameter. The heavier-duty replacement is 1 1/4". This, along with some new front shocks, should improve handling with the heavier big-block Olds engine.
The rear sway bar was designed for the smaller-diameter S-10 axle housing, so I needed to do some minor modifications (involving spacers and larger u-bolts) to attach it to the larger-diameter Ford axle.
Because of limited space in the engine compartment, there was no room up front for a radiator. So, I mounted the radiator(s) behind the cab. I decided to use 2 cross-flow rads (both taken from full-sized Oldsmobiles), to make sure to have enough cooling capacity. I needed to mount these in a way that allowed for adequate air flow, and run electric fan(s) to pull the air through at low speeds. I built a custom bracket for each radiator out if 1" square tubing for rigidity and reasonably light weight. My next task was to mount these behind the cab in a way that was efficient for both air-flow and plumbing.
To get the most air flow possible through the radiators, I built a bottom shield/scoop to draw in air, and at the same time shield the radiators from the heat of the exhaust system directly below.
Some of the cooler air flowing under the cab will be deflected upwards by the lower shield, in the center and on both sides,
With both radiators mounted, the next step was to plumb cooling system lines from the front of the engine along the frame to behind the cab, where the radiators are located. Modifications to the box were also be needed to make it fit the S-10 frame, and to allow for maximum air movement behind the cab and through the radiators.
Before running the coolant lines to the radiators, I decided to put the running boards on, so any welding of the brackets would be done before the coolant lines were run under the cab. And, the front fenders had to be on to properly position and mount the running boards. So, the front end sheet metal was installed and fitted for the final time (I hope). I decided that the remains of the former rad support were still in the way, making the alternator, power steering pump, and belts very crowded to get at. So, I did some more cutting, and ended up with an engine bay with a lot more room at the front.
 |
| I used wooden blocks to support and position the running boards while I bolted them to the front fenders and welded the brackets to the frame. |
To help prevent clamped hoses from slipping off pipes at the connections, I ran a mig weld bead around the end of each piece of pipe.
I also wanted a high-point air bleed near the engine, to make filling the cooling system easier. I manufactured one using a petcock, a brass fitting, and a section of pipe. I inserted this part into the upper rad hose, near the thermostat housing.
The next step was to mount the dual 15" electric cooling fans on the rear radiator. The used fan setup I bought came with an aluminum shroud, control module, and temperature sensor. The shroud was too large for my radiator(s), so I needed to fabricate a smaller shroud, then re-mount the fan hardware.
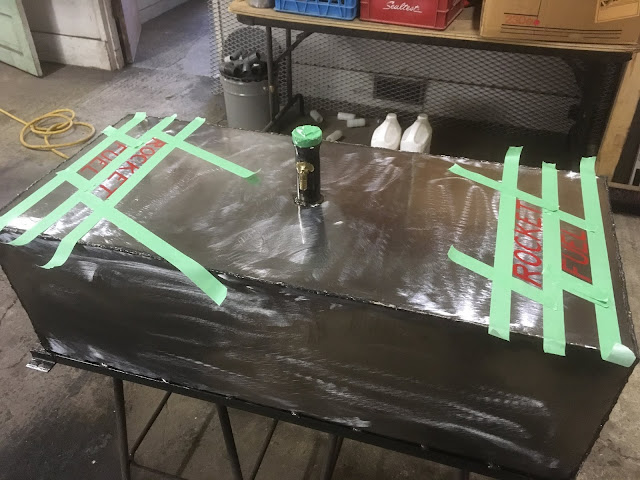
The next step was to finish building the fuel tank. I built it 12" tall x 16" wide x 48" long, so it should hold just under 25 gallons (94 liters), to allow a reasonable cruising range on a tank of fuel. The folks at Wunder Sheet Metal in Lloydminster were kind enough to put some bends in the 16 gauge sheet metal for me, to reduce the number of seams I needed to weld.
 |
| The fuel outlet, ready for some 5/16" gas line hose, an in-line fuel filter, and some clamps. |
I added baffles to prevent tidal waves in the tank when turning corners, accelerating or decelerating.
For a filler neck, I used an oil filler tube and cap from an Olds engine.
I built a simple vent into the filler neck, using a small brass elbow. (Note: This proved to be inadequate the very first time I filled up at a gas pump. I had to change up this filler setup with an additional larger vent later on.)
I decided on a bare metal look with a grinder finish, to be clear-coated later. Note the fuel gauge by the front corner of the tank -- a piece of clear fuel line to show the fuel level. I decided this would be the most simple and accurate gauge.
To minimize the amount of heat the exhaust pipes would radiate underneath the fuel tank, I wrapped the pipes with insulating tape, just as I did under the radiators.
Once the fuel tank was grinder-finished, I gave it a couple of coats of clear, and a touch of red paint.
The box front was cut out and replaced with expanded metal to allow air to flow through the radiators. The bottom was also cut out of the box to allow the box to sit low enough over the frame, and also to help with air flow.
The box sides needed wheel openings cut out, since the rear axle was narrowed to fit the rear tires inside the fenders. All this cutting and removing left the box without much structural support, so I welded in some x-braces out of re-bar to keep things square and rigid until the box was mounted on the frame. Once the box was on the truck, the next step was to build inner fenders and a new floor frame.

Now that the box was positioned on the frame, I used 1" square tubing to build a floor frame and box divider. I was then able to remove the temporary re-bar x-braces, and start building inner wheel-wells. These were necessary since I narrowed the rear axle, and still wanted to fit the wider tires inside the stock rear fenders. This meant that the tires would intrude into the box slightly on each side.

With both wheel-wells built, the rear fenders went back on (after some minor repairs, such as welding up cracks and hammering out some minor dents), followed by a spare tire holder.
The next steps were to make a battery holder, and build a removable cage to protect the radiators (and to protect fingers from the electric fan blades).
After the radiator cage came construction of the box floor. The floor frame and box "front" (which is located behind the fuel tank) are built of 1" square tubing, which will be covered with 16 gauge sheet steel.
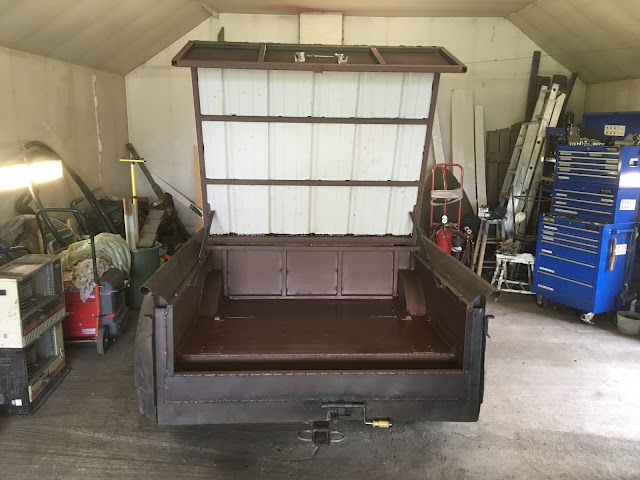
I decided to build a one-piece tonneau cover and end gate, which will hinge at the front and swing up like a trunk lid to cover the cargo area and keep it water-tight and dust-proof.
Next came the sheet metal for the box front and box floor. I used 16-gauge steel for this.
|
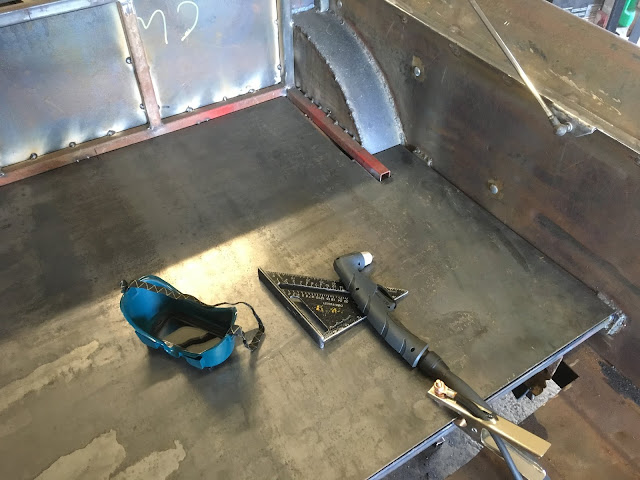
The main box floor panel was carefully measured then cut to fit using a plasma cutter. This included 4 small openings to allow access to the rear shocks, and to the two rear bolts that hold the box to the frame. These would be closed up with removable plates later.
To allow the floor plate to be welded to the box floor frame in the center as well as the outer edges, I drilled several holes to allow me to spot weld this panel to the 1" square tubing floor frame. All spot-welded seams around the edges of the panels would be later sealed and made water-tight with automotive caulking.
|
Before sheeting in the rearmost part of the box floor, I built and installed a trailer hitch, while the frame was still partly accessible from above. This truck will be a driver, not a yard ornament, so I want to be able to pull a utility trailer and/or a small camper (maybe a rat retro camper might be my next project...).
Once the hitch was welded solid to the frame (not coming off -- ever), I finished sheeting in the dropped back portion of the cargo floor. I was able to gain a little extra space because the back of the truck frame was a little shorter than the box. A common issue with lowering old trucks on newer frames is a very shallow box floor due to the height of the frame rails as they go over the rear axle. I tried to salvage as much cargo space as possible.
 |
| My high-tech trunk latch and locking system |
I welded 16 gauge sheet metal onto the inside of the tailgate, after adding a couple of upright members for strength. The roofing tin I used for the tonneau cover was cut, fitted, screwed on, then removed again so the outer edges and screw holes could be waterproofed before the final installation.
I scrounged through some old tools to find just the right parts for the license plate holder.
Once the tin was screwed down, all the seams where water could leak into the trunk were sealed with leftover windshield urethane or automotive body caulking. Once the weatherstrip is installed around the perimeter, the trunk should be water-tight and dust-proof.
Before shooting a coat of paint on the inside of the trunk, I wiped all the bare metal down with metal conditioner. I chose flat brown Tremclad, so primer wasn't needed.
I also played around with some other Tremclad colours, to give the top and back of the tonneau cover / end gate an aged appearance to be a closer match to the patina on the rest of the truck. I used green, flat brown, and flat black for this. I also removed the radiator cage, and also painted it flat brown.
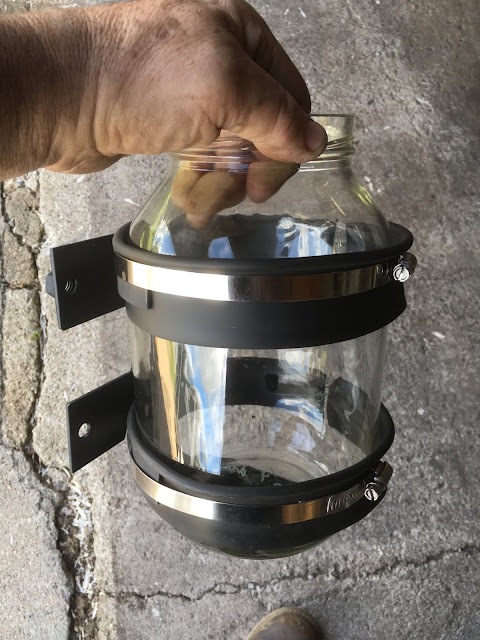
Another detail to finish on the back half of the truck was a coolant overflow container. Since I have two radiators and several feet of coolant lines running all the way to the front of the truck, I needed a larger than average container for this. I decided a glass pickled-egg jar would be perfect, so I made a bracket to mount it, and modified the metal lid to accommodate the necessary plumbing.
Another detail that required a re-visit was the ride height of the back of the truck. After adding all the steel required for the trailer hitch, enclosed trunk (including the steel tonneau cover), etc, the rear end sat about 2" lower than its original height when I first installed the gutted and stripped-down box. So, I removed another 1 1/2" off the rear lowering blocks (leaving just enough to maintain the correct angle of the differential in relation to the transmission), and also removed and reinstalled the rear leaf springs, with an extra leaf added.
 |
| These original springs only had 3 leaves plus an overload. |
With the extra leaf added, the springs maintained their arch a lot better. Of course, removing and replacing leaf springs without the benefit of a hoist is always a pain in the butt, and this was no exception. It was nice to get done, and to have everything bolted back together again.
 |
| This is the final ride height, with the box completed, and the (empty) gas tank installed. This allows some extra capacity for fuel, luggage, and even a small trailer hooked up behind. |
Since this truck will be a driver, a heater is needed (even if only to clear the windshield on rainy days). I took the original heater from the truck, and removed the burnt-out 6-volt fan and the old heater core. I manufactured a more space-efficient heater assembly using part of the old heater body, and adding the heater core and blower motor from my '86 Chevette parts car. The temperature will be controlled by a valve in the heater hose to control the flow of coolant through the heater core.
My next main job was wiring. I ran new wiring bundles to the rear of the truck for taillights, license plate light, and trunk light, then wired up the nose of the truck, as well as the alternator and voltage regulator.
I already had Sunpro temperature and oil pressure guages, so I purchased a voltage meter and tach to match. The speedometer is a GPS speedometer, that uses a tiny antenna to measure speed and distance rather than a conventional cable from the transmission. I thought this would be a great option, and very simple to install and hook up. The gauges all fit nicely into my license-plate dash panel.
The instrument panel gauges are now installed with wires labeled, along with the (scavenged) headlight switch, dimmer switch, fuse box, and horn relay.
In 1948, these old farm trucks (and probably other vehicles as well) came with headlights and park lights only. Turn signals, brake lights, and back-up lights were a later addition sometime in the 1950's. So, it was up to me to find or manufacture something suitable.
For the front, I found some cone-shaped LED lights, and paired them with some chrome bullet-style nose cones meant to fit the front of a '57 Chevy. For the back, I used another pair of these same nose cones, along with some 3" aluminized exhaust pipe and a pair of LED tail-lights (meant for a '59 Cadillac) to construct a rocket-style tail-light assembly for each side of the box. I thought these would be a good fit for a truck with an Olds Rocket engine.
After mounting back-up lights, trunk light, horns, headlight switch, horn and heater switches, all needed connecting under the dash. At this point, all electrical was hooked up except wipers, interior dome light, and signals/brake lights. Starter and ignition switch worked, so the truck was ready for startup whenever I decided to put in gas and coolant.
 |
| The headlight switch is '76 Olds, and the heater switch is from a '75 Ford pickup. |
 |
| The voltage regulator is an electronic model from an '83 Ford, and the horn relay is from a '76 Olds. A headlight relay wasn't needed, as it is built into the Olds headlight switch. |
The starter solenoid and the alternator (not seen in this photo) are from a 75 Ford truck.
I had to take my time with wiring, since I have such a mix of Ford and General Motors components. I often referred to my own pencil-drawn plan, a '71 Olds shop manual, and an '81 Ford shop manual.
With all the wiring complete, glass was the next step. After several hours of careful work, I was able to remove and replace the old windshield with new laminated safety glass, cut by Crystal Glass in Lloydminster, AB. Re-installation was a tricky procedure (including drilling and tapping small holes in the frame before re-assembly) but the end result was pretty cool. This windshield opens at the bottom (by means of a small crank on the dash) for cab air flow, with hinges at the top.
I was able to re-use the rear window, but both side windows were scratched and pitted, so I also replaced those.
I also spent a few hours manufacturing and mounting some side mirrors on each door. Once again, I felt home-built was more fun than store-bought.
At long last, it was time to fill up the gas tank and the cooling system, then go for a test run. Unfortunately, first startup included 3 leaking steel fuel fittings and 2 leaky radiators. The fuel line was an easy fix, but both rads turned out to be no good. Luckily, I was able to find a used aluminum rad out of a late 90's (?) Dodge truck with a Cummins diesel. So, I re-configured my whole radiator setup from two rads back to one. Fortunately, it works like a charm, and has a cleaner appearance than with the two rads plumbed together.
In 1948, seat belts were not an option in these trucks, but neither was a big-block Olds V-8 power plant or highway gears. Back in the day, this truck likely saw only low speeds and little or no traffic. I could have legally done without seat belts due to the age of the truck, but didn't think that was a wise choice. So, I was able to salvage a set of good 3-point seat belts from my '77 Ford pickup out back, and took the time to build in some sturdy anchors in the floor and at shoulder height, so I now have modern retractable lap/shoulder belts. With the seat belts, modern suspension, radial tires, power steering, power disc brakes, anti-sway bars, and modern LED lighting, this truck should be far safer than when it was new back in 1948.
I also took a little time to cut and fit some rubber floor mats before I bolted the seats and seat belts back in place to stay.
Of course, in a perfect world, everything would work right. In real life, however, there are glitches. I got the engine fired up, cooling system full and operating well, and all seemed good. As I was fiddling and tuning, I hooked up my timing light and discovered that the distributor had a little bit of vacuum advance, and no mechanical advance whatsoever. So, after replacing the distributor with a brand new unit, I was able to successfully set the timing. Then, I discovered that the charging system had quit working. Some testing revealed that the alternator was fine, but the external voltage regulator wasn't. After one more used replacement and one new unit, I discovered that I had wired the charging system incorrectly. Moral of the story: DON'T TRUST EVERYTHING YOU SEE ON THE INTERNET!! After some helpful advice from Tyler at Xtreme Auto in Lloydminster, I rewired my fourth (yes, fourth) regulator correctly, and all is good now. After a couple of short road tests on the back roads near my place, I was quite happy with how the truck ran, drove, rode, steered, and braked.

There were a few tasks left to do once the truck was running. I took the truck for a wheel alignment and discovered that it still needed 2 ball joints and a center link. After replacing those (on my shop floor, without the aid of a hoist), finishing off my exhaust system (including chrome tips on the dual exhaust), and a few other small odds and ends, the truck was ready for the 2 1/2 hour road trip to Saskatoon for the city's annual "cruise weekend."
This is where the project is at (as of late August 2020). I've put around 920 hours of labour into this truck in total. There are still a few tweaks needed, but overall I would consider this project complete. Now comes the easy part -- going cruisin' as often as possible!
Updates:
After 3 summers on the road, this truck has travelled over 28,000 km, including a 4200 km trip in June 2022 from Saskatchewan to Vancouver Island and back.
I have gradually tweaked the cooling system a bit at a time (shrouding, scooping, etc) to improve air flow at highway speeds (to counteract the low-pressure area behind the cab which works against the electric fans). Results have been pretty good so far.
I have also replaced the very well-used Ford alternator and external voltage regulator with a larger integrated GM unit. This keeps up better with the radiator fans, headlights, etc.
Windshield wipers have been for decoration only until the spring of 2022, when the electric motors were rebuilt by Premier Auto Electric in Lloydminster. These 6-volt electric motors are wired in with resistors to allow them to operate safely on 12 volts.
I had to switch driver’s side and passenger side wiper motors partway through our BC road trip in June 2022, when the driver’s side decided to quit working. The very small 74-year-old fibre drive gears decided to lose a few teeth.
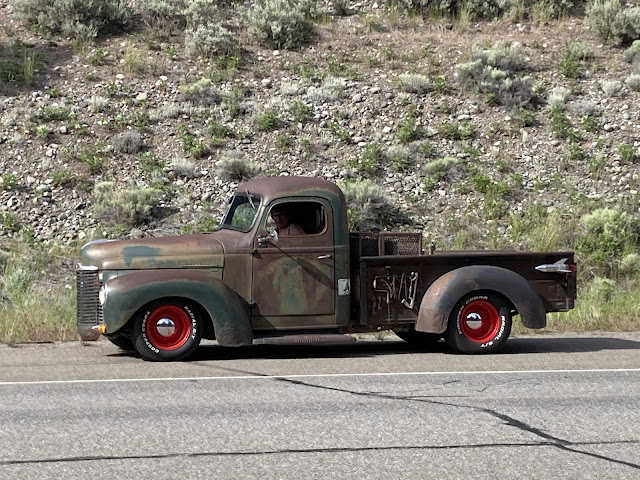
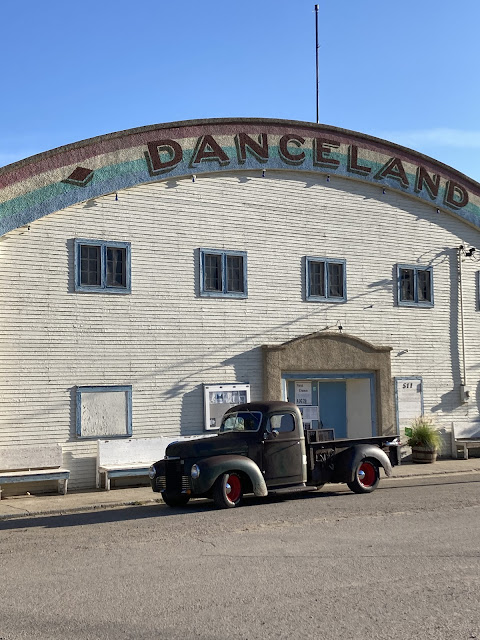
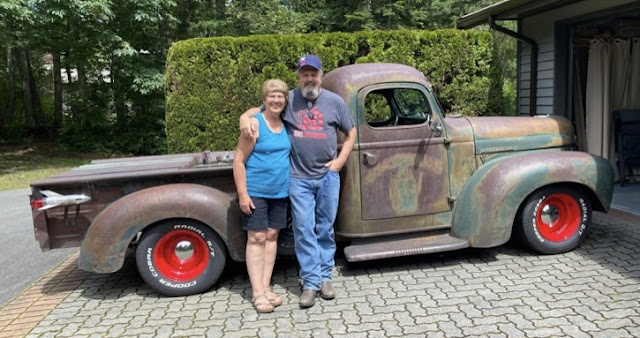
Overall, the truck has performed very well and has proven to be very reliable. It has been to countless show & shines around Saskatchewan and Alberta, and has generated many conversations with lots of different people. Here are just a few photos of its many travels:
Assiniboia, SK (Aug 2021)
Frank Slide (southern BC)
Wilkie, SK show & shine 2021
Manitou Beach, near Watrous, SK
Near Eatonia, SK
Regina, SK at the Access Communications show & shine (2022)
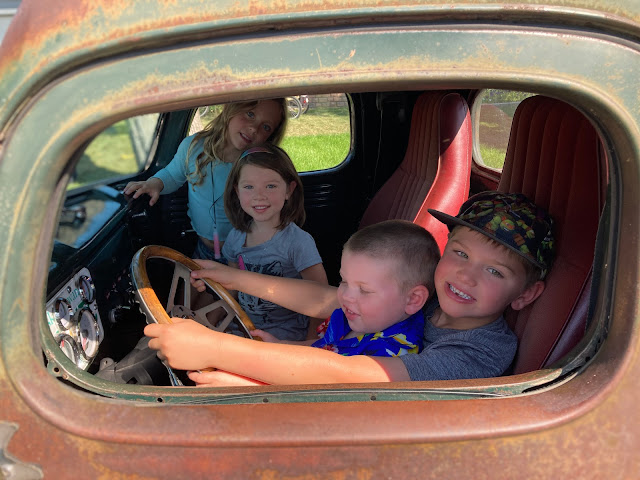
The great nieces and nephews thought this old truck was pretty cool. They asked how to turn on the A/C, and “Where is the button to make the windows go up and down?” Ha ha
Wednesday night show & shines in Lloydminster

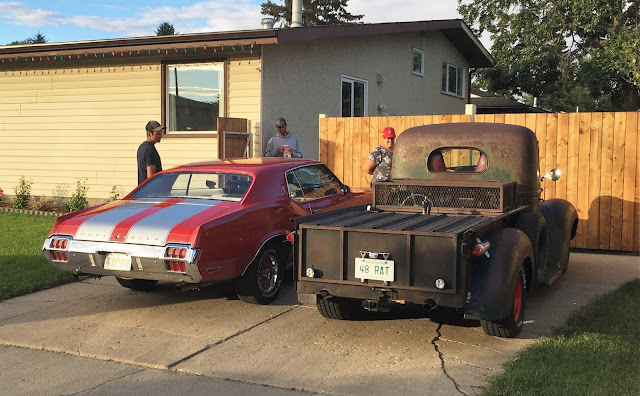
At the Rosetown car show (Sept 2022). Two Olds Rocket-powered rides side by side.
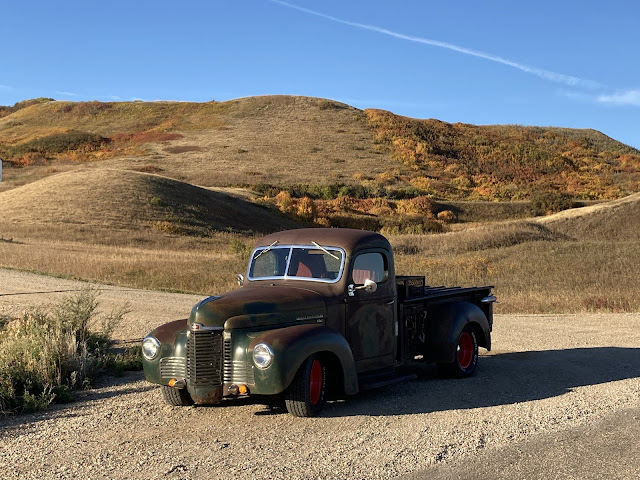
A scenic stop on Highway 51 between Kerrobert and Springwater, SK
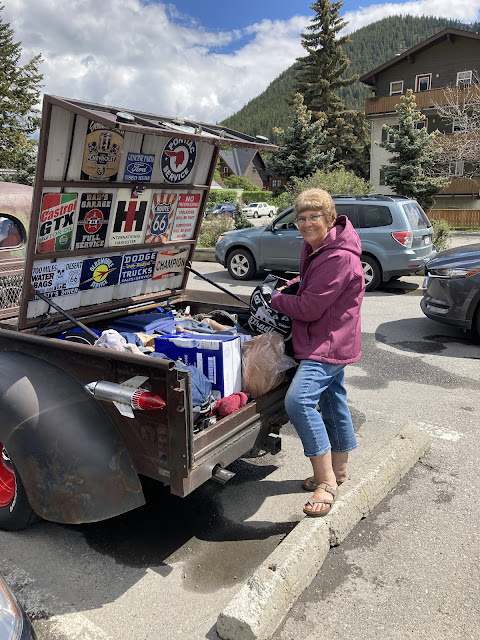
Banff, AB
3 dinosaurs in one photo. Ha ha
Near Pincher Creek, AB
Taking Coleen’s aunt for a ride in Kelowna, BC
Revelstoke, BC (note the crazy gas prices in June 2022)
Campbell River, BC (on Vancouver Island)
My truck won the “Most Interesting” award at the Wainwright Motor Club show & shine (Aug 2022)
At the Kootenay Pass summit, between Creston and Salmo, BC
At Sidney, BC (on Vancouver Island)
Waiting to board the Swartz Bay ferry from Vancouver Island back to the mainland
Somewhere between Golden, BC and Banff, AB
Cruise Night in Saskatoon, SK (Aug 2022)
I recently had the experience of having my truck featured in a Prime Time Local News interview in Lloydminster.
The following link should take you to the video:































That is just Awesome. I followed the link on FB from a post I shared.
ReplyDeletenice job you did i have one with a nova clip and 350 in it and a chev step side box. just starting a kb short box on a s-10 frame and found your blog
ReplyDelete